The Process
I have always been interested in color and finding useful ways to re-use things. I guess that’s how I started quilting – finding cloth that I liked and wanting to put it to good use. Learning how to mix fabrics and color and finding that almost everything did go together in nature and when it didn’t it was obvious! When I moved on to weaving, I found that I couldn’t always find the right color or shading and I would become frustrated that the end product did not measure up to what my mind’s eye visualized. That’s when Barbara suggested that I try dyeing! Reading, taking classes and trial and error have helped develop this innate sense for the way colors and things should come together – and the way they should not.
To give you an example of the way my eye works – I put together flower boxes for the porch. One year the boxes became stretched out in the middle so that when it rained the soil would wash out. My husband tried to fix this by placing a bright green string around the middle of the dark green box to hold the soil in place. It worked well except that I only noticed the bright green string! Not the beauty of the flower box.
That’s what happens when I’m dyeing – when it comes together the way it should I’m at peace and harmonious with my work and when it doesn’t I know it instantly. I just wish I knew how to make it better each time.
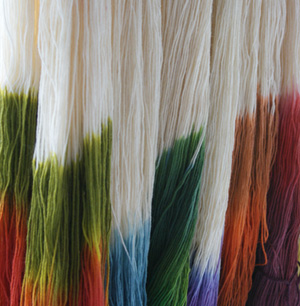
The process of Dyeing is simple. You gather material to dye, treat it so that the dye will take, heat it so the dye will set, rinse and dry it. You have created something with which you will enjoy working. For those who want to learn the nuts and bolts of dyeing go to Amazon.com and find Hand Dyeing Yarn and Fleece: Custom-Color Your Favorite Fibers with Dip-Dyeing, Hand-Painting, Tie-Dyeing, and Other Creative Techniques by Gail Callahan which will be available on Jan 27, 2010.
For the rest of us, let me run through a short primer on dyeing animal fibers (like wool). The fiber must be treated to allow it to accept the dye. This is done by soaking it in a weak acid solution (white vinegar and water) then letting the excess liquid drain out. Second, add the dye for the color(s) you hope your yarn will be. Third, set the dye by heating your yarn in a microwave, or steam bath or even in the sun until the liquid is clear. Fourth, rinse out any residue from the acid bath, dye etc. and finally, dry it and the yarn is ready to use. If you are unhappy with the first attempt you can over dye the yarn to get a usable color.
Since all color derives from the three primary colors, how you mix, blend, and shade become the factors in creating something that you like and in my case that I hope other people will like and wish to own for themselves.


